Uploading a screenshot.
Now that you have a saved image you are ready to upload it. There are many hosting sites and you are welcome to use whichever you like best. In this tutorial we will be using tinypic, it's free and you do not have to register. I personally use photobucket, for which you do have to register, but you can then set-up privacy controls.
Step 1:
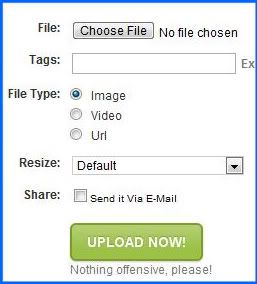
Go to tinypic.com, photobucket.com, imageshack.us, or another image hosting site. Click on "choose file" navigate to your file (usually in pictures), click on "open", then click on "Upload Now" (you might have to enter a captcha).

Step 2
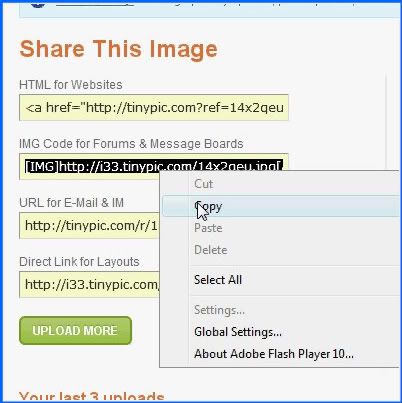
Once your file is uploaded, you will be presented with links to copy to your post. You want to copy (right click and copy) the one that starts with [IMG].
(click the image to play the video)

To insert that link into your post just right click on your post and select "paste".

Now that you have a saved image you are ready to upload it. There are many hosting sites and you are welcome to use whichever you like best. In this tutorial we will be using tinypic, it's free and you do not have to register. I personally use photobucket, for which you do have to register, but you can then set-up privacy controls.
Step 1:
Go to tinypic.com, photobucket.com, imageshack.us, or another image hosting site. Click on "choose file" navigate to your file (usually in pictures), click on "open", then click on "Upload Now" (you might have to enter a captcha).

Step 2
Once your file is uploaded, you will be presented with links to copy to your post. You want to copy (right click and copy) the one that starts with [IMG].
(click the image to play the video)

To insert that link into your post just right click on your post and select "paste".

No comments:
Post a Comment